Home
How to Find and Use Every Blackmarrow Key in Mortal Shell 2
In Mortal Shell 2 , there are exactly 8 Blackmarrow Keys hidden across the world. These keys are used to unlock "Shades" (cosmetic skins) for each of the game's 8 Shells. All keys are redeemed in the Marrow Keep elevator room . While some keys are found in plain sight, others require Night Mode or specific inventory items like the Slayer Seal to access.
The journey through the decaying landscapes of Mortal Shell 2 is as much about style as it is about survival. For many players, the standard appearance of Harros or Eredrim eventually gives way to a desire for something more distinct. This is where the Blackmarrow Keys come into play. These rare items serve as the currency for the game's most prestigious cosmetic rewards, allowing you to customize your Shells with intricate designs that reflect your mastery of the game's challenging combat.
Unlike standard equipment, Blackmarrow Keys are finite. There is exactly one key for every Shell, meaning a completionist run requires finding all eight. According to official community documentation , these keys are scattered across both the standard world state and the more dangerous Night Mode, making the hunt a multi-layered puzzle that spans the entire campaign.
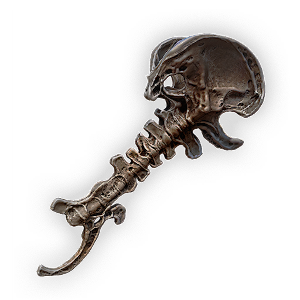
Image source: Mortal Shell 2 - Fextralife
Where to Use Blackmarrow Keys in Marrow Keep
Before you begin your hunt, you must know where to spend your hard-earned keys. The central hub for all Shade unlocks is the Marrow Keep elevator room . This room is located directly beneath the main Beacon area. To reach it, take the central lift down from the Sester’s chamber. You will find a circular room lined with eight ornate chests, each corresponding to a specific Shell.
The mechanics of these chests are specific. You cannot simply walk up to a chest and open it; you must be actively inhabiting the Shell that matches the chest. For example, if you wish to unlock the Blackmarrow Shade for Eredrim, you must have Eredrim equipped. If you attempt to open a chest while in the "Foundling" (shell-less) state or while wearing the wrong Shell, the chest will remain magically sealed.
Many players worry about wasting a key on a skin they might not like. Fortunately, Mortal Shell 2 includes a "Preview" feature. When you interact with a chest while wearing the correct Shell, the game will display a high-resolution image of the Shade before asking for confirmation. You can back out of this menu without consuming your key, allowing you to save your keys for the Shells you use most frequently.
According to advanced gameplay reports , the elevator room is also a safe zone. No enemies will follow you into this chamber, making it an ideal spot to swap Shells and experiment with your new aesthetics. Once a key is used, it is removed from your inventory permanently for that playthrough, and the chest will remain open, serving as a visual marker of your progress.
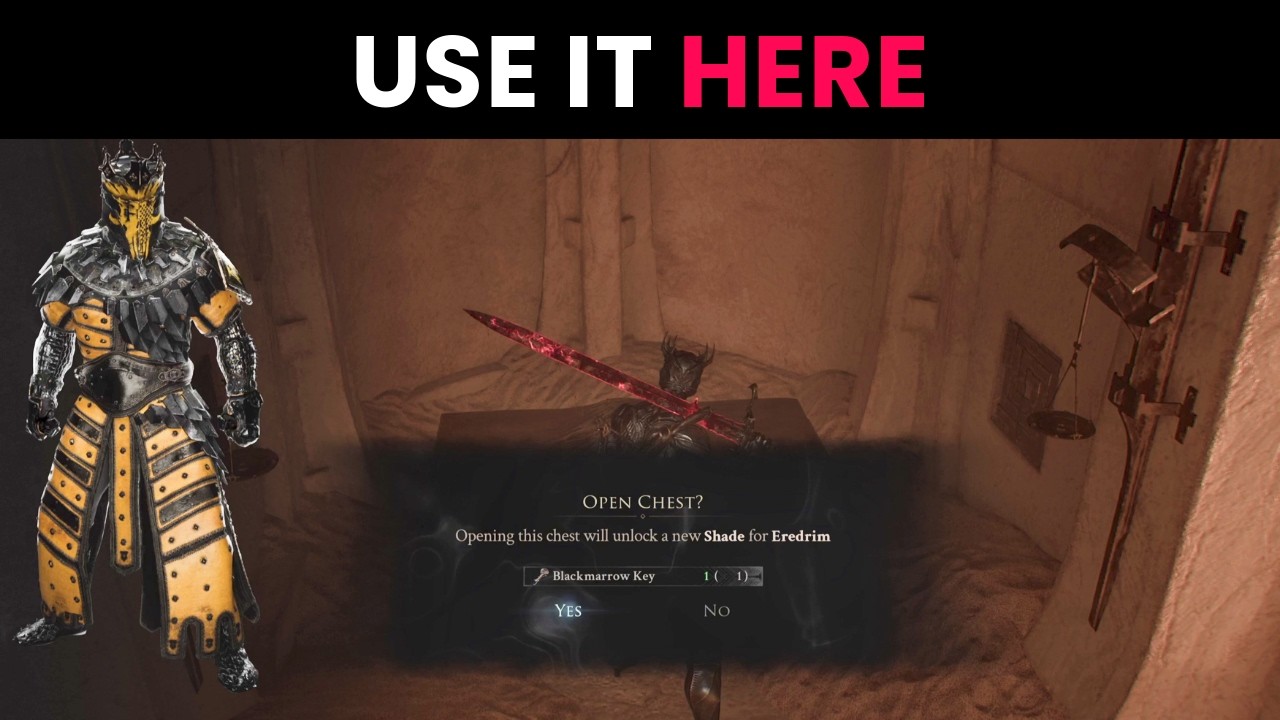
Image source: YouTube
Essential Prerequisites for Key Hunting
You cannot find all eight keys immediately. The game gates several of these items behind specific world states and inventory requirements. If you are exploring a location mentioned in this guide and the key is missing, you likely haven't met the necessary prerequisites.
- The Gloombound Flame
- This is the most critical item for key hunters. It is obtained by interacting with the ritual stone located directly behind the Great Arbiter of Flesh boss arena in Widow's Overlook. Without this flame, you cannot access Night Mode.
- Thestus the Time-Keeper
- Once you have the Gloombound Flame, return to Marrow Keep and speak with Thestus. By offering him a small amount of Glimpse, he can toggle the world between Day and Night. Several keys only spawn when the world is shrouded in the magical fog of Night Mode.
- The Slayer Seal
- Found on a stone chair in the chamber adjacent to the Marrow Keep Beacon, this seal is required to "Commune with Chaos." This is the only way to open the hidden path to the Desolate Keep, which houses one of the most elusive keys.
It is highly recommended that you secure the Slayer Seal as early as possible. While it doesn't provide a combat buff, its utility as a "key to the keys" makes it a top-tier priority for completionists. Many players mistakenly believe the Slayer Seal must be equipped in a quick-item slot, but simply having it in your permanent inventory is sufficient to trigger the necessary environmental interactions.
All 8 Blackmarrow Key Locations and How to Get Them
The following locations are listed in a suggested order of acquisition, starting with the easiest early-game options and moving toward the high-difficulty late-game secrets.
The Fastest Early-Game Key in Marrow Keep
The absolute fastest way to get your first skin does not require any boss fights or Night Mode. Within Marrow Keep itself, there is a hidden wall marked with a faint mushroom symbol and a carved arrow. This wall is located in the corridor leading toward the Abandoned Outpost. Simply strike the wall to reveal a small alcove containing a chest with your first Blackmarrow Key. This is widely considered a "gift" from the developers to allow players to customize their starting Shell almost immediately.
Buying the Key from The Collector
The Collector is a unique merchant who only appears during Night Mode . You can find him in the Abandoned Outpost (Mammon’s territory) in the large clearing where the archers usually congregate during the day. He sells a single Blackmarrow Key for 1500 Gold . While this is a significant investment early on, it is the most straightforward way to acquire a second key. Ensure you have cleared the area of enemies before engaging in trade, as Thestus's fog brings out more aggressive variants of the standard brigands.
Solving the Shrine of Sorrows First-Person Puzzle
Located in the Mushroom Village during Night Mode, the Shrine of Sorrows offers a significant gameplay shift. Upon entering the shrine, the camera locks into a first-person perspective . This is a non-combat zone where you must solve a environmental puzzle involving giant, glowing mushrooms. You must strike the mushrooms in the correct sequence (indicated by the pitch of the sound they emit) to open the central pedestal. This key is often missed because players avoid the Mushroom Village at night due to the high density of poison-emitting enemies.
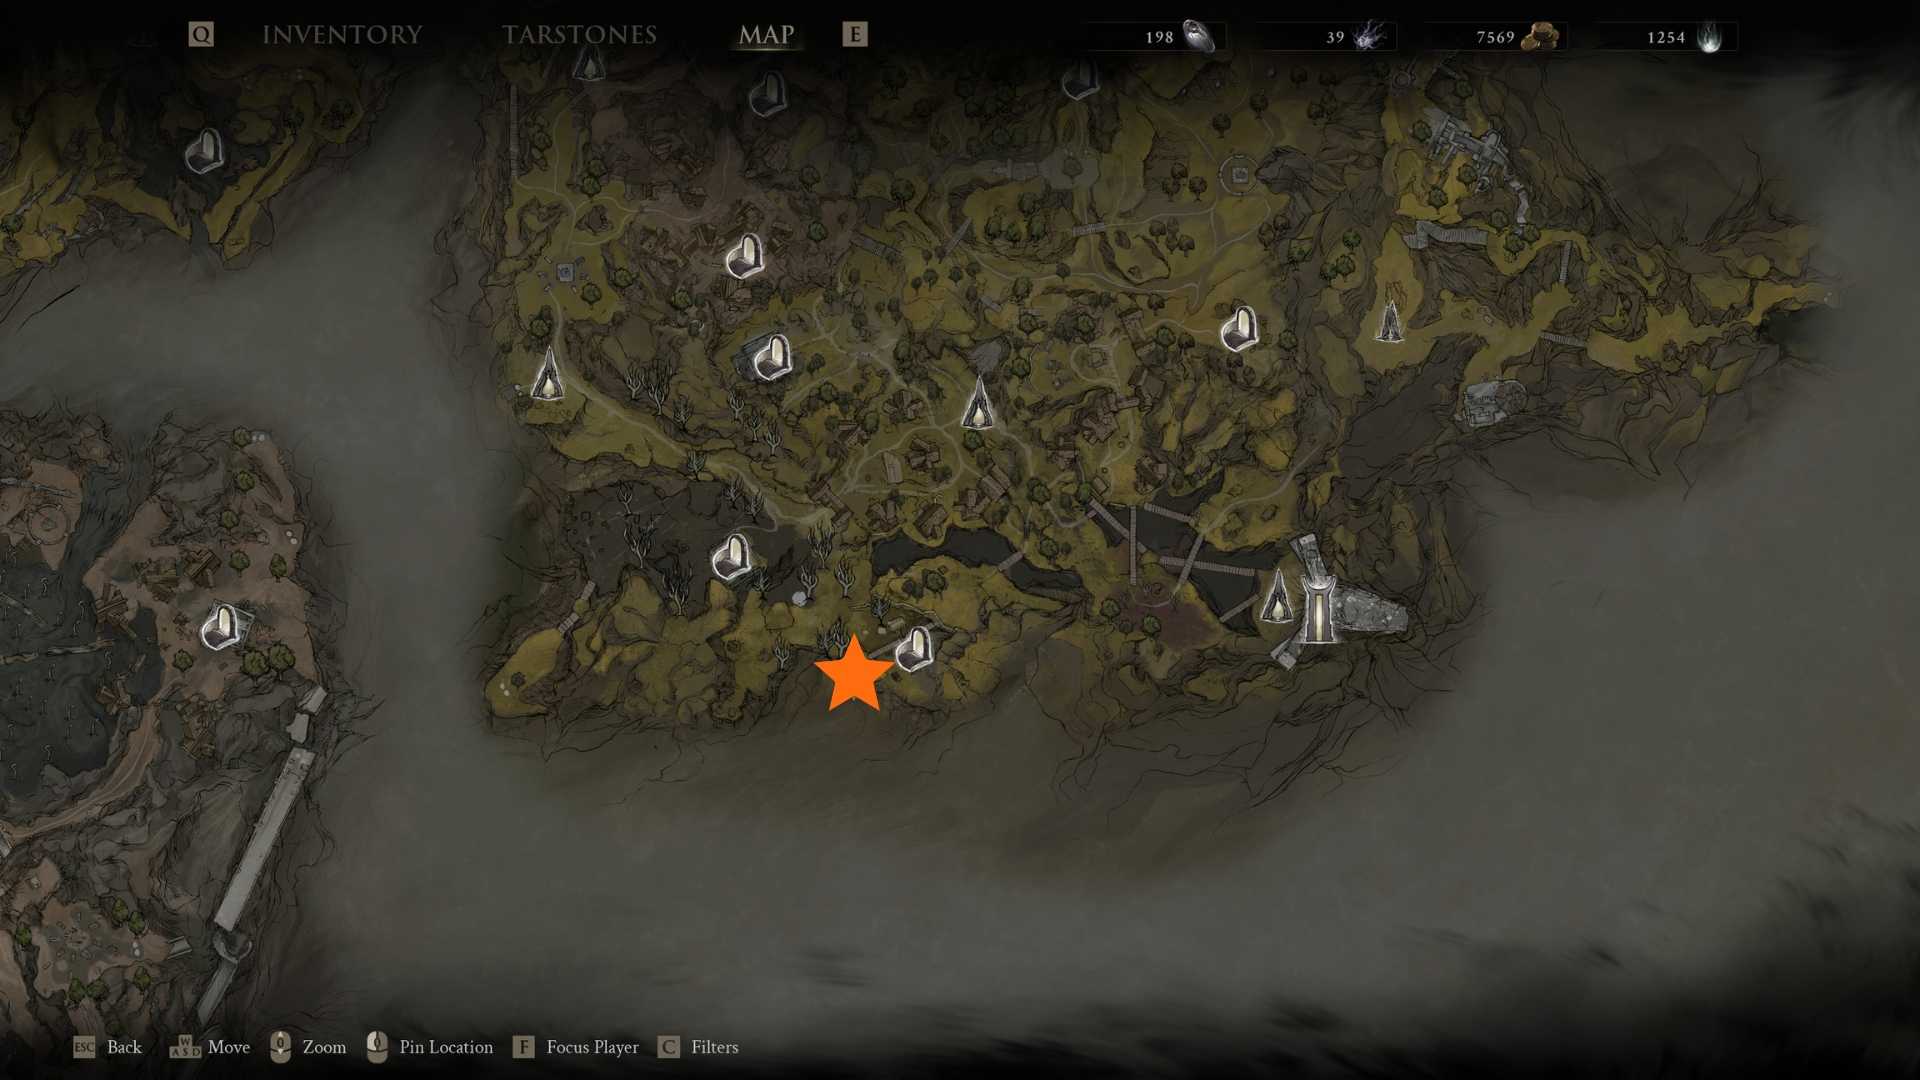
Image source: GameRant
Entering the Desolate Keep Secret Dungeon
This is perhaps the most famous secret in Mortal Shell 2. In the room where you first meet Sester Genessa (the tutorial area), there is a wall with a large arrow symbol. If you possess the Slayer Seal , you can interact with this wall to "Commune with Chaos," causing the wall to dissolve. This leads to the Desolate Keep, a mini-dungeon filled with high-level wraiths. The key is located at the very end of the keep, guarded by a dual-wielding elite knight. This area is recommended for players who have upgraded their weapons at least three times.
The Abbey Entrance Scaffolding Leap of Faith
Near the Sester’s Refuge in the Abbey of Mammon, look for the wooden scaffolding clinging to the outer tower wall. Most players use this to climb up, but if you look down from the second level, you will see a small, isolated stone ledge that seems unreachable. This requires a "leap of faith." By sprinting and jumping at the apex of the scaffolding, you can land on the ledge. A small chest containing a Blackmarrow Key sits there. According to GameRant's exploration guide , this is one of the most difficult platforming challenges in the game.
The Child’s Feeding Ground Secret Room
After you defeat the Lost Child boss, you are tasked with cleansing the Ova. Once the cinematic ends and you are back in control, do not leave the area immediately. Return to the original pedestal where the Ova was located. A secret door will have opened in the back of the room. Inside, you will find a Blackmarrow Key and a bonus reward of +26 Ova , which is a significant boost for Shell progression. This key is frequently missed because players tend to teleport back to the hub immediately after a boss fight.
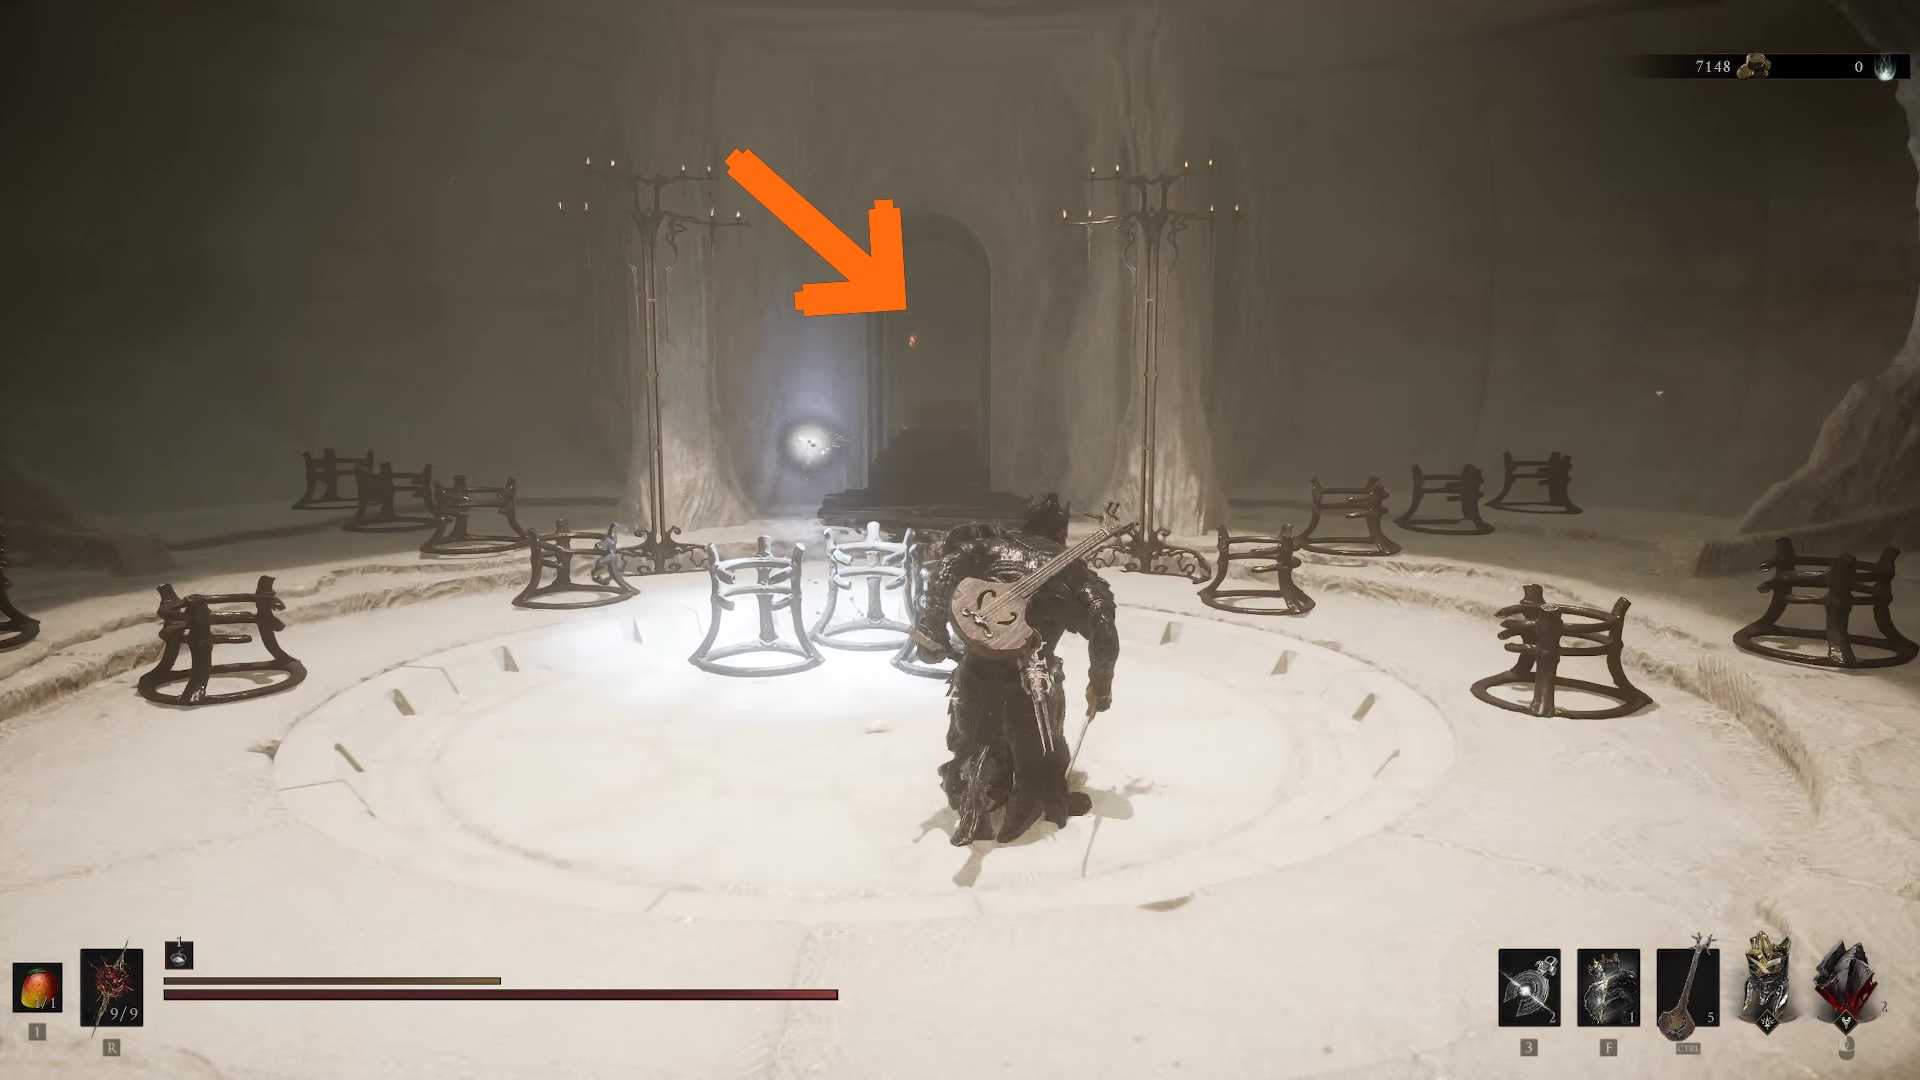
Image source: GameRant
Late-Game Night Mode Discovery 7
The seventh key is tucked away in the Eternal Narthex during Night Mode. You must navigate the teleporter maze to reach the highest platform, which is normally empty during the day. At night, a powerful "Glimpse Horror" spawns here. Defeating this mini-boss grants the seventh key. This encounter is exceptionally strong and requires mastery of the "Hardening" mechanic to survive the horror's rapid-fire magic attacks.
Late-Game Night Mode Discovery 8
The final key is located in the Enshrined Sanctum. During Night Mode, the frozen lake area thaws slightly, revealing a path beneath the ice. Follow this path to a hidden grotto where the final chest resides. This key is widely regarded as one of the most atmospheric finds in the game, as the grotto contains lore tablets explaining the origin of the Blackmarrow ritual itself.
Which Shell Skins Do These Keys Unlock?
Each key corresponds to a specific "Shade." While the keys themselves are identical, the chest you choose to open determines your reward. Below is a breakdown of the most popular Shells and the aesthetics of their Blackmarrow Shades.
| Shell Name | Shade Name | Key Source (Recommended) | Aesthetic Description |
|---|---|---|---|
| Harros | Founding Shade | Marrow Keep Wall | Polished steel with gold filigree and a white cape. |
| Eredrim | Blackmarrow Shade | The Collector | Dark obsidian armor with glowing crimson runes. |
| Tiel | Shadow Shade | Shrine of Sorrows | Translucent smoke effect on the cloak and hood. |
| Solomon | Scholar Shade | Desolate Keep | Runic etchings covering the entire plate surface. |
| Hadern | Deliverance Shade | Child's Feeding Ground | Weathered bronze with tattered purple accents. |
Choosing which Shade to unlock first depends entirely on your playstyle. If you prefer the tanky nature of Eredrim, his Blackmarrow Shade ranks among the top choices for its striking visual presence in dark environments. Conversely, Tiel's Shadow Shade provides a more subtle, ghostly appearance that fits his high-mobility gameplay.
How to Fix Common Blackmarrow Key Glitches
As with any complex RPG, Mortal Shell 2 has a few technical quirks that can interfere with your key hunting. Understanding these can save you hours of frustration.
- The "Invalid Dungeon Name" Bug: If you see a glitched marker on your map near Marrow Keep, ignore it. This is a known UI bug related to Sester Genessa’s questline and does not indicate a missing key or a hidden dungeon.
- Missing Key After Death: If you die at the exact moment you pick up a key, it may not appear in your inventory. Check the "Lost Items" pile next to Sester Genessa in Marrow Keep; the game usually teleports "orphaned" quest items there.
- Thestus Won't Toggle Night: Ensure the Gloombound Flame is in your active inventory. If you have moved it to your storage box, Thestus will not recognize that you have the ability to change the time.
- Chest Won't Open: Double-check that you are inhabiting the correct Shell. You cannot open Solomon's chest while wearing Harros, even if you have a key in your inventory.
According to community discussions on Reddit, these issues are typically resolved by restarting the game or traveling to a different zone and back. The developers have addressed many of these in recent patches, but the "Invalid Dungeon Name" marker remains a common sight even in New Game Plus (NG+).
Frequently Asked Questions
How many Blackmarrow Keys are in Mortal Shell 2?
There are exactly 8 Blackmarrow Keys available in a single playthrough. Each key corresponds to one of the 8 playable Shells. Once you have used all 8, you cannot obtain more until you start a New Game Plus cycle, where the chests reset but your previously unlocked Shades remain available.
Can I miss any keys permanently?
No, none of the Blackmarrow Keys are permanently missable. Even after defeating the final boss, you can continue to explore the world and collect any keys you missed. However, some keys are much easier to obtain before certain world-altering events occur, so it is generally better to hunt them as you progress.
Do keys carry over to New Game Plus (NG+)?
Yes, any unused Blackmarrow Keys in your inventory will carry over to your next playthrough. However, because the chests in the Marrow Keep elevator room reset, most players find it more efficient to spend their keys before finishing their current run.
What is the fastest way to get a skin?
The fastest method is to find the hidden wall in Marrow Keep. It requires no combat and can be accessed within the first 10 minutes of reaching the hub. This allows you to unlock a Shade for your starting Shell (usually Harros) almost immediately.
Why can't I open the chest in the elevator room?
The most common reason is that you are not wearing the specific Shell that matches the chest. Each of the 8 chests is "tuned" to a specific Shell. You must inhabit that Shell to interact with the chest and spend your key.
Key Takeaways for Blackmarrow Key Hunting
- Redeem keys in the circular elevator room beneath Marrow Keep.
- Inhabit the correct Shell to open its corresponding Shade chest.
- Obtain the Gloombound Flame from Widow's Overlook to unlock Night Mode.
- Secure the Slayer Seal from the chair near the Beacon to access the Desolate Keep.
- Check boss arenas like the Child's Feeding Ground for secret rooms after the fight.
- Use the Preview feature to see a Shade before committing your key.
- Ignore the "Invalid Dungeon" map bug as it is a harmless UI glitch.
Start your collection today by finding the hidden wall in Marrow Keep to unlock your first Shade in under a minute.