Home
How to Find Every Mortal Shell 2 Offering and Unlock All Secret Chests
In Mortal Shell 2 , "Offerings" are environmental puzzles requiring you to light three hidden candles in a specific zone to unlock a Secret Vault or Offering Chest. If you find a chest that says "2 Offerings Needed" despite lighting all candles, you are likely encountering a common UI glitch. To fix this, enter your Harbinger form , quit to the main menu, and reload your save. This forces the game to re-check the candle states.
The world of Mortal Shell 2 is significantly more vertical and complex than its predecessor, hiding its most valuable resources behind environmental riddles. Among these, the "Offering" mechanic stands out as a primary hurdle for completionists. These puzzles are not merely about finding items; they are tests of observation that reward players with unique Tarstones and equipment that can define a character build.
Whether you are navigating the claustrophobic alleys of Mushroom Village or the soaring heights of the Temple of Vatra, understanding the logic behind these candles is essential. This guide consolidates community knowledge and verified fixes to ensure you never leave a secret chest unopened.
What Are Offerings and How Do They Work?
Offerings in Mortal Shell 2 function differently than the NPC-based offerings found in other Soulslike titles. While you may occasionally encounter NPCs like Egon or the Great Fish who request specific items, the "Offering Needed" prompt on a stone chest refers specifically to environmental candles .
These candles emit a distinct, ghostly blue or white glow, often visible from a distance if the lighting is dim. However, developers have placed many of these in high-contrast areas—near lava or bright sunlight—making them remarkably easy to overlook. When you approach a locked Offering Chest, the UI will display how many candles remain unlit (e.g., "3 Offerings Needed").
It is important to distinguish between these environmental puzzles and NPC interactions. For instance, giving an offering to the Fish results in a unique reward/consequence cycle, whereas lighting candles simply unlocks a physical container. According to IGN's research , the "Rule of Three" applies to every environmental offering puzzle currently discovered in the game.
Where to Find Every Offering Candle in Mushroom Village
Mushroom Village is the first major area where players encounter this mechanic, and it serves as a tutorial for the frustrations to come. The chest here is located near the central stage, a hub of activity for the local mushroom-headed inhabitants.
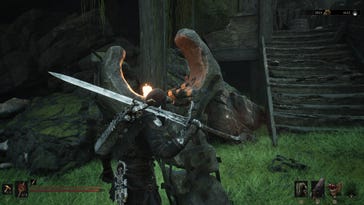
Image source: IGN
How to Get the 3rd Candle Without a Cage Key
The most common point of failure for players in Mushroom Village is the third candle. Standard guides often suggest purchasing a Cage Key from a vendor to access the small barred enclosure containing the candle and a mushroom enemy. However, community testing has revealed a significant shortcut: Brute Force .
You do not actually need the key. A heavy melee attack or a jump-strike will shatter the lock on the cage, allowing you to interact with the candle immediately. This saves your precious Tar for early-game Shell upgrades rather than utility items. As noted in several Reddit community discussions , this "Information Gain" tip is often missed by players who assume the lock is an indestructible quest barrier.
Exact Locations for the Mushroom Village Puzzle
- Candle 1: Located directly behind the stonework to the right of the central stage. It is partially obscured by overgrown flora.
- Candle 2: Head to the Mushroom Village Beacon. Look for a narrow alleyway to the left; the candle is sitting on a small wooden crate at the end of the path.
- Candle 3: Inside the breakable cage mentioned above. The cage is situated on the elevated path overlooking the village square.
Rewards Found in the Mushroom Village Chest
There is some conflicting data regarding the reward for this specific chest. While some sources suggest it contains the Auspicious Stone (which provides a significant boost to Melee Critical Chance), others have reported finding the Troubadour's Lute . This discrepancy likely stems from version differences or the presence of two separate chests in the vicinity. If you are looking for the Lute, ensure you check the secondary chest located near the swamp exit.
How to Unlock the Revenant Graves Offering Chest
The Revenant Graves area introduces a higher level of difficulty, both in combat and puzzle-solving. The offering chest here is located in a small alcove just before the arena for the second major boss. Unlike the village, the candles here are tied to combat challenges.
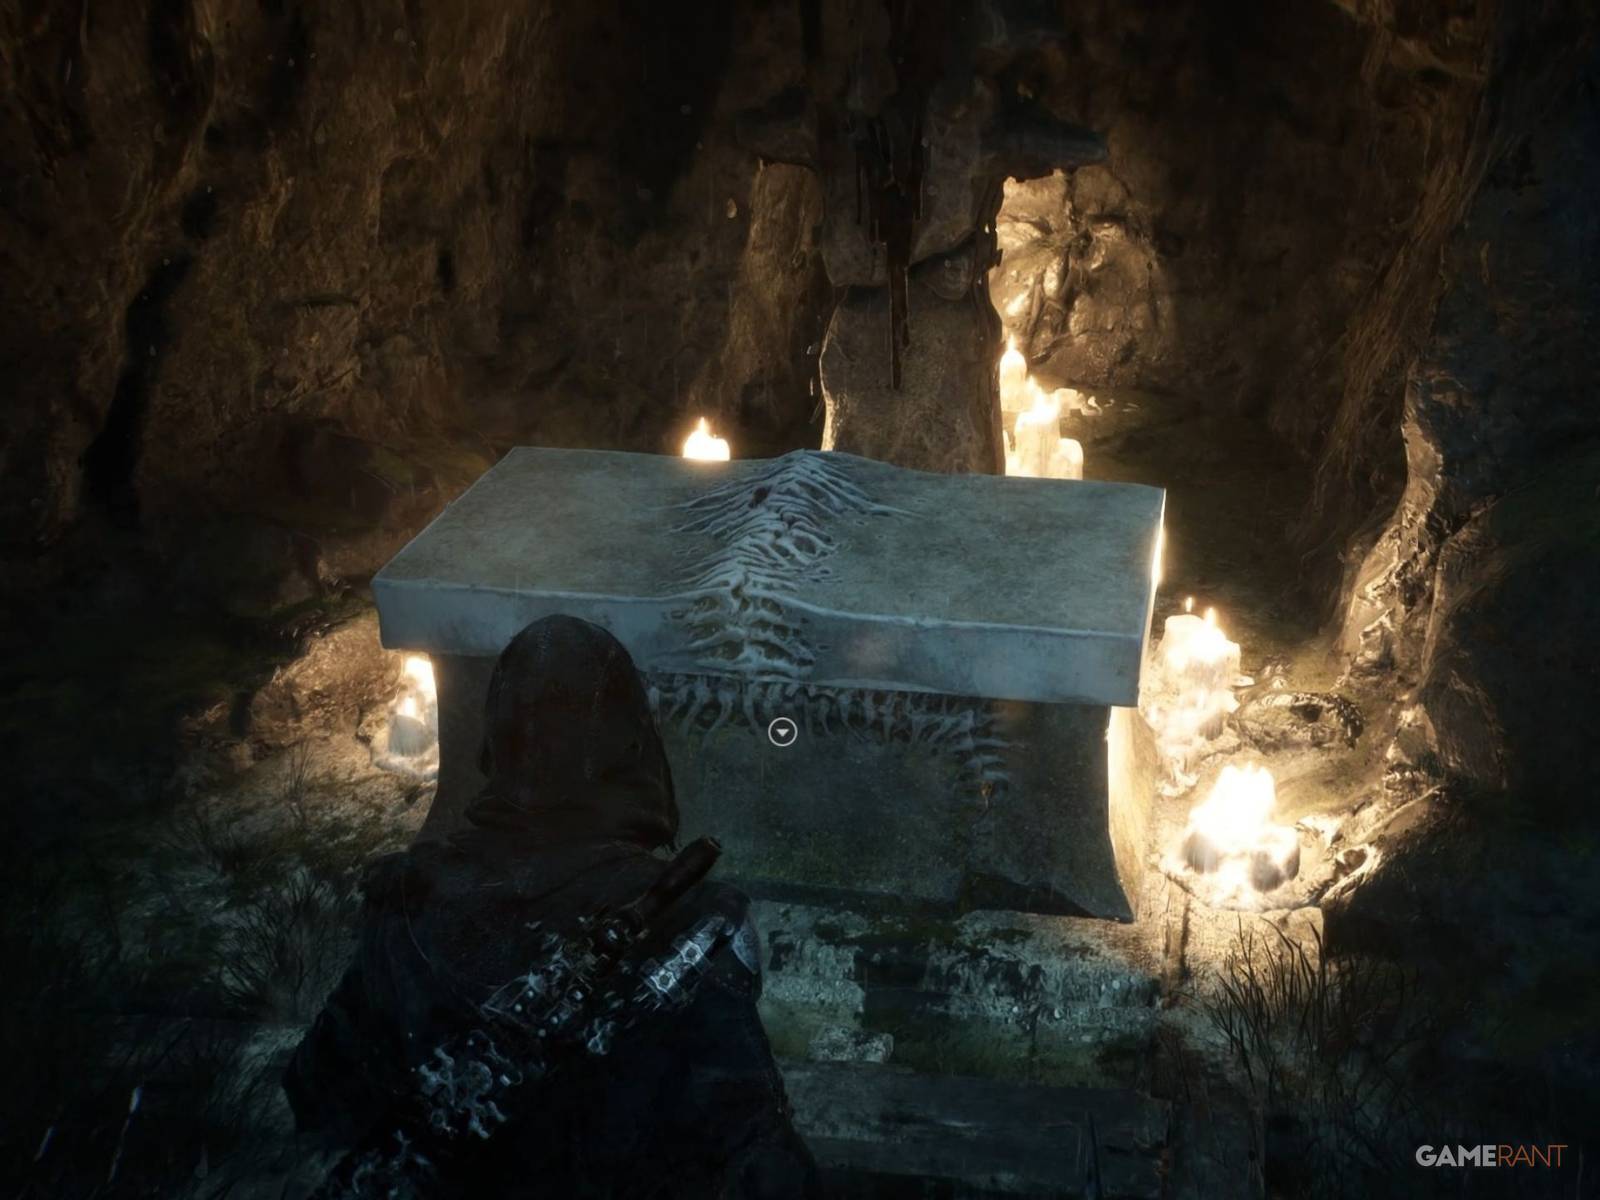
Image source: GameRant
Navigating the Corrupted Statue Challenge
The second candle in the Revenant Graves is hidden behind a "Corrupted Statue." To light it, you must first defeat a wave of spectral enemies that spawn when you approach. This challenge is a test of your "Harden" timing, as the enemies attack in rapid succession. Once the area is cleared, the statue's glow will fade, revealing the candle at its base.
The third candle is located near a spawn point for exploding enemies. It is highly recommended to clear these enemies from a distance using a crossbow or throwing items, as their death explosion can knock you off the narrow ledges, forcing a long trek back from the nearest Beacon.
Stats for the Siegebreaker Tarstone Reward
The reward for the Revenant Graves chest is widely considered one of the top-tier items for heavy builds: the Siegebreaker Tarstone . At Level 3, this item provides a 250% boost to Ranged Stagger. While this may seem niche, it allows players to "stun-lock" even large elite enemies using the Ballistazooka, creating a safe window for follow-up melee attacks. This synergy is a cornerstone of the "Heavy Artillery" meta currently favored by high-level players.
Finding the Hidden Candles in the Temple of Vatra
The Temple of Vatra is perhaps the most frustrating zone for offering hunters due to its extreme verticality. The candles here are not hidden behind walls but are instead placed on different elevation levels that require precise platforming to reach.
According to GameTyrant's walkthrough , one candle is located on a floating buttress that can only be reached by dropping down from the upper prayer hall. If you miss the drop, you must cycle back through the entire temple complex. The visual clutter of the temple—flowing lava and glowing runes—makes these candles particularly difficult to spot without the "Glimpse of Wisdom" buff, which highlights interactable objects in the environment.
Unlocking Secret Vaults in the Unfound Path and Abbey Entrance
Late-game areas like the Unfound Path and the Abbey Entrance feature "Secret Vaults" rather than simple chests. These vaults require the same 3-candle mechanic but lead to entire rooms filled with lore items and high-level upgrade materials.
The Abbey Entrance puzzle is frequently missed because players are often rushing toward the boss fog. The candles are hidden in the rafters of the entrance hall. You will need to use the "Crawl" ability—obtained mid-game—to reach the narrow spaces where these candles reside. The reward here is often a "Glimpse of Fallacy," which is essential for unlocking the final tiers of your Shell's skill tree.
How to Fix the 2 Offerings Needed Bug and Other Glitches
One of the most significant pain points in Mortal Shell 2 is the "2/3 Offerings" bug. Players will often light all three candles, hear the success chime, yet find the chest still locked with a UI prompt claiming one offering is missing. This is a known state-tracking error.
The Harbinger Fix for Glitched Chests
Community members on Steam Community forums have identified a specific sequence that ranks among the most effective methods for resolving this glitch:
- Stand directly in front of the locked, glitched chest.
- Activate your Harbinger form (the spectral state).
- While in this form, open the pause menu and select "Quit to Main Menu."
- Reload your save file.
- Upon spawning back in, the game should perform a fresh check of the world state and recognize the third candle, allowing the chest to open.
Why You Should Never Abandon a Partial Puzzle
The primary cause of these soft-locks is "Abandonment." If you light one or two candles and then leave the zone—either by traveling to a different Beacon or entering a boss arena—the game often "locks" the candles in a lit state but resets the chest's internal counter. This creates a permanent soft-lock where the candles cannot be re-interacted with. Always finish the 3-candle set before leaving the immediate area.
What to Do if the Interaction Prompt Is Missing
If you find a candle but the "Interact" prompt does not appear, try reloading at the nearest Beacon. This forces a "rekindle" of the environmental assets. If this fails, verify your game files through Steam or your console's storage settings, as missing interaction prompts are often tied to corrupted local data rather than in-game logic.
Are the Offering Chest Rewards Actually Worth the Effort?
Given the potential for bugs and the difficulty of finding some candles, many players wonder if the rewards are worth the time. The answer depends largely on your playstyle and how much you value "Meta" build optimization.
Comparing the Top Tarstones and Items
| Item Name | Location | Primary Effect (Lv. 3) | Best Build Pairing |
|---|---|---|---|
| Auspicious Stone | Mushroom Village | +18% Melee Crit Chance | High-Speed / Dagger Builds |
| Siegebreaker | Revenant Graves | 250% Ranged Stagger | Crossbow / Heavy Shells |
| Troubadour's Lute | Mushroom Village | Unique Sidearm / Stun | Crowd Control / Cosmetic |
| Nightgrasp Stone | Revenant Graves | Glimpse Generation | Resource Farming |
The Desolate Keep Grisha Exploit for Farmers
While hunting for offerings, you may find "Remnants" near the candle sites. These items are part of a hidden mechanic in the Desolate Keep (a secret dungeon accessible from the hub). By collecting these Remnants, you can build a "Necromancer" style Grisha-summoning build. This allows you to summon a friendly Grisha to fight alongside you, which is exceptionally strong for tackling the harder Offering challenges in the Temple of Vatra.
Frequently Asked Questions
- Where is the 3rd candle in the Mushroom Village?
- The third candle is located inside a locked cage on the elevated path overlooking the village. You do not need a key; simply hit the lock with a heavy melee attack to break it and gain access to the candle.
- Should I give an offering to Egon?
- Egon is an NPC, and his "offering" is a separate questline. Giving him the requested item unlocks a unique Shell shade and lore dialogue, but it does not affect the environmental offering chests found throughout the world.
- Can I open the chests after the final boss?
- Yes, but only if you do not trigger the final cutscene that leads to New Game Plus. Once you enter NG+, all world states reset, and you will have to find and light the candles again to unlock the chests.
- Do candles reset if I die?
- Generally, no. Once a candle is lit, it stays lit even after death. However, if you die and then leave the zone before lighting all three, you run the risk of triggering the "2/3 Offerings" bug mentioned earlier.
- What happens if I give an offering to the Fish?
- Giving an offering to the Great Fish provides a temporary but powerful buff to your health regeneration, but it also increases the damage you take from environmental hazards like poison for a set duration.
Key Takeaways for Finding Every Offering
- The Rule of Three: Every offering puzzle in the game requires exactly three candles to be lit.
- Brute Force the Cage: Save your Tar in Mushroom Village by breaking the cage lock with a weapon instead of buying a key.
- Use the Harbinger Fix: If a chest glitches at 2/3 offerings, use the Harbinger-Quit-Reload sequence to force a reset.
- Finish What You Start: Never leave a zone after lighting only one or two candles to avoid permanent soft-locks.
- Prioritize Rewards: Focus on the Revenant Graves chest if you use a heavy build, as the Siegebreaker Tarstone is a top-tier stagger tool.
- Listen for the Hum: Use audio cues to locate candles hidden in bright or visually cluttered areas like the Temple of Vatra.
Before heading into your next session, double-check your inventory for any Remnants you may have picked up near candles to begin your Grisha-summoning build at the Desolate Keep.