Home
How to Design an Efficient Stardew Valley Storage Shed Layout for Your Farm
Mastering space management in Pelican Town with the latest 1.6 strategies.
For most players, the Big Shed is a top-tier choice, offering 137 tiles of interior space on a small 7x3 exterior footprint. In the 1.6 update, the introduction of Big Chests (70 slots) and the Iridium Scythe has shifted the meta toward denser, more automated-feeling layouts. While the 137-keg layout is mathematically dense, many veteran players prefer the 135-space spiral layout for its superior movement flow and lack of backtracking.
How the 1.6 Update Changes Your Shed Layout Strategy
The 1.6 update for Stardew Valley introduced several items that significantly alter how players approach building interiors. The most impactful addition is the Big Chest . Previously, players needed massive rows of standard chests to organize their late-game hauls. A Big Chest holds 70 unique items compared to the standard chest's 36, effectively doubling your storage density per tile. This means a dedicated storage shed now requires half the physical footprint, leaving more room for artisan machines or decorative elements.
Another notable advancement is the Iridium Scythe . While primarily a tool for harvesting crops, its wide swing radius allows players to harvest items from Garden Pots through other objects. According to technical analysis on the Stardew Valley Wiki , this enables ultra-dense layouts of up to 168 Garden Pots in a Big Shed—a configuration that was previously impossible to harvest manually without removing machines. This makes the Big Shed a highly effective indoor greenhouse for high-value crops like Pineapples or Ancient Fruit (if using Deluxe Retaining Soil).
Furthermore, the 1.6 update introduced the Dehydrator and Fish Smoker . These machines have different processing times and shapes than the traditional Keg or Jar, requiring players to rethink their "batch" math. Designing a shed that accommodates these new artisan tools while maintaining a clean path is essential for maximizing daily profit without spending hours in-game just navigating your buildings.
Comparing Shed and Big Shed Dimensions and Costs
Before planning your interior, you must understand the physical constraints of the building. The Shed is unique because its interior is much larger than its exterior footprint. Both the standard Shed and the Big Shed occupy a 7x3 area on your farm map, making them exceptionally space-efficient compared to Barns or Coops.
| Building Type | Exterior Size | Interior Size | Total Tiles | Upgrade Cost |
|---|---|---|---|---|
| Standard Shed | 7x3 | 11x9 | 99 | 15,000g + 300 Wood |
| Big Shed | 7x3 | 17x12 | 204 | 20,000g + 550 Wood + 300 Stone |
Upgrading to a Big Shed is widely regarded as one of the strongest investments in the mid-game. For a total cost of 35,000g (plus materials), you more than double your usable space without losing a single tile of outdoor farm land. However, players should note that material costs from Robin increase significantly in Year 2. If you are buying wood and stone, it is highly recommended to complete these upgrades during Year 1 to save tens of thousands of gold.
Which Building Offers Strong Storage Density for Your Farm?
While the Big Shed is the standard choice, it isn't the only option for indoor production. Some players utilize Deluxe Barns or even Upgraded Cabins to house their machines. Each has distinct advantages depending on your stage of the game and your specific needs.
Big Shed (137 Capacity)
- Smallest exterior footprint (21 tiles).
- Easy to move via Robin's shop.
- Designed specifically for machines and decor.
- Accessible early in the game.
Deluxe Barn (136 Capacity)
- Larger exterior footprint (28 tiles).
- Slightly lower capacity than a Big Shed.
- Can be used for animals if you change your mind.
- More expensive to fully upgrade.
The "secret" champion of storage density is actually the Upgraded Cabin . A fully upgraded Cabin offers a staggering 351 interior tiles. However, this requires a second player (or a second controller in split-screen) to initiate the upgrades. For solo players, the Big Shed remains the most practical and efficient choice for centralized production. As noted in community discussions on the Stardew Valley Forums , the Big Shed's rectangular shape is also easier to tile with machines compared to the multi-room layout of a farmhouse or cabin.
Efficient Big Shed Layouts for Producing Artisan Goods
When it comes to filling your shed with Kegs, Preserves Jars, or Crystalariums, there are two primary schools of thought: the "Wiki Max" and the "Community Spiral."
How to Reach the Maximum 137 Machine Capacity
The 137-tile layout is the mathematical limit for a Big Shed while still allowing the player to reach every machine. This layout uses long vertical rows with a single-tile path winding between them. While it maximizes profit per building, it has a significant drawback: backtracking . To reach the machines at the very end of the rows, you must walk the entire path and then walk all the way back out. In a game where every second of the clock matters, this can become tedious during large harvests.
Why the 135 Space Spiral Layout Is Better for Real Gameplay
Many experienced players prefer the 135-space "Spiral" or "IKEA" layout. This configuration sacrifices two machine slots to create a continuous loop. You enter the shed, walk in a spiral pattern, and end up back at the door once you've interacted with every machine.
According to research shared on Reddit , the number 135 is also highly divisible (by 3, 5, 9, 15, 27, and 45). This makes it much easier to manage batches of crops. If you have 135 Kegs, you know exactly how many Ancient Fruits you need to pull from your chests. The 137 layout, being a prime number, often leads to awkward leftovers in your inventory.
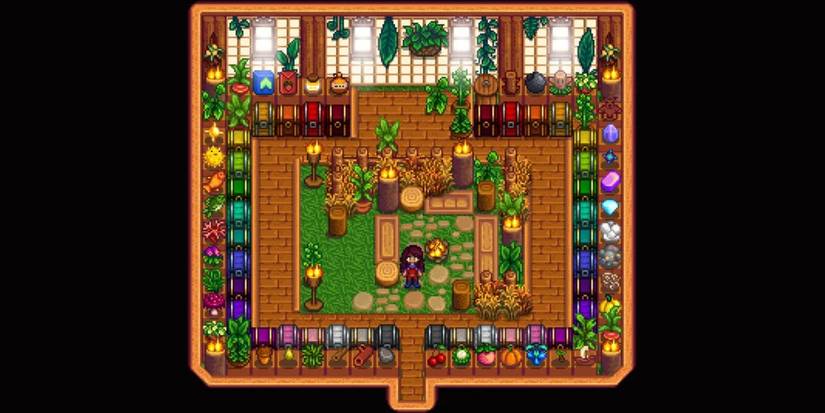
Image source: TheGamer
Designing a Controller Friendly Shed Layout for Console Players
If you play Stardew Valley on Nintendo Switch, PlayStation, Xbox, or using a controller on PC, you may have noticed that reaching corner machines is difficult. Unlike PC players who can click any visible tile with a mouse, controller players rely on a grid-snapping system that favors the four cardinal directions.
In a maximum-density 137 layout, the machines placed in the corners of the "U-turns" are often unreachable with a joystick. To solve this, a Controller-Friendly Layout typically removes 4 to 6 machines from the corners, creating "dead zones" that allow the cursor to snap correctly to the adjacent machines. While this reduces your total output slightly, it prevents the frustration of having a single Keg stuck in a corner that you can't harvest without breaking the machine next to it.
Maximizing Space with the Iridium Scythe Layout
The 1.6 update's Iridium Scythe is a significant step forward for indoor farming. By using Garden Pots, you can grow crops inside a shed year-round. However, Garden Pots usually require a path so you can reach each one to harvest.
With the Iridium Scythe, you can harvest in a 360-degree arc that reaches through solid objects. This allows for a 168-pot layout . In this design, you fill the entire shed with pots, leaving only a minimal path. You stand in the center of clusters and swing the scythe to collect everything at once. This is one of the most efficient ways to produce Coffee, Hops, or Pineapples, provided you have Deluxe Retaining Soil so you never have to water them.
How to Organize Your Storage with Big Chests
Storage is the primary reason most players build their first shed. With the 1.6 Big Chests, you can create a "Master Hub" that handles every item in the game. A popular choice is to line the top and side walls with Big Chests, color-coding them by category.
- Green Chests: Foraged items, seeds, and fertilizers.
- Red Chests: Mining materials, ores, bars, and monster loot.
- Blue Chests: Fish, bait, tackle, and beach forage.
- Yellow Chests: Artisan goods, honey, and animal products.
- Grey Chests: Building materials like wood, stone, and clay.
- Purple Chests: Rare items, artifacts, and gems for gifting.
Using Wood Signs or Stone Signs behind the chests is a top-rated method for visual organization. By placing an item on the sign, you can see exactly what is in the chest without opening it. This is particularly useful in the late game when you may have dozens of chests filled with thousands of items.
Aesthetic Shed Layouts That Maintain Functionality
Efficiency doesn't have to mean an ugly farm. Many players use sheds to create themed rooms that serve a purpose while looking beautiful. The 1.6 update added new furniture and flooring options that make this easier than ever.
The Cozy Winery and Tasting Room
Instead of cramming 137 Kegs into a dark room, you can place 80-100 Kegs around the perimeter and use the center for a tasting room. Add a large table, some bar stools, and decorative plants. Use the Wood Floor or Rustic Plank Floor to give it a cellar feel. This layout still produces a significant amount of wine but feels like a natural part of a high-end farm.
The Industrial Smeltery and Workshop
Moving your Furnaces, Heavy Press, and Charcoal Kilns into a shed keeps your farm exterior clean. An industrial layout often uses Crystal Path or Stone Walkway Floor . You can organize your machines in "workstations"—one area for smelting iron and gold, another for refining quartz, and a third for wood processing. This centralizes all your crafting materials in one spot.
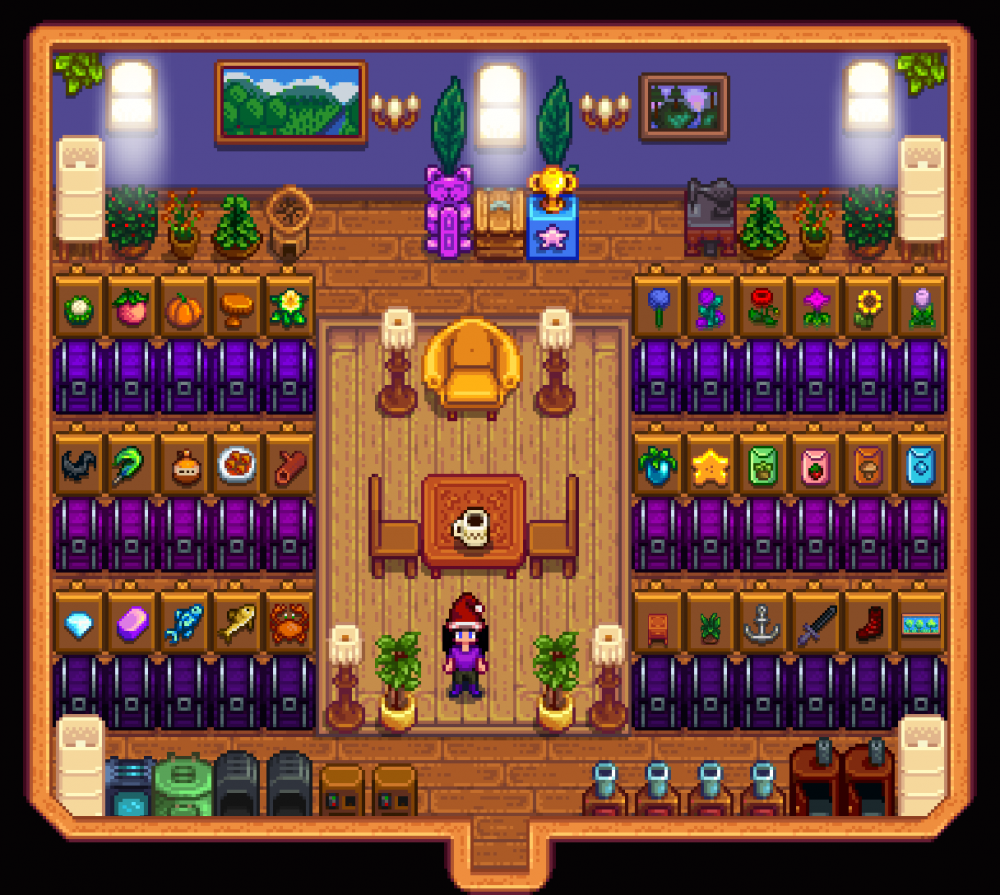
Image source: Stardew Valley Forums
Common Mistakes to Avoid When Planning Your Shed
Even veteran players can make errors when setting up a new production hub. One of the most common mistakes is forgetting the door clearance . When placing machines, ensure the tile directly in front of the door is clear, or you may find yourself trapped inside after a long day of decorating.
Another pitfall is miscalculating machine timing . If you mix Kegs (which take 7 days for wine) and Preserves Jars (which take 2-3 days) in the same shed without a clear organization system, your harvest cycle will become desynced. It is usually better to dedicate one shed entirely to a single type of machine to keep your workflow consistent.
Frequently Asked Questions
Final Thoughts on Shed Optimization
Optimizing your Stardew Valley shed layout is a balance between mathematical efficiency and personal playstyle. Whether you are chasing the maximum profit of a 137-keg layout or the smooth flow of a 135-keg spiral, the 1.6 update provides more tools than ever to customize your experience.
- Prioritize the Big Shed upgrade early to maximize your interior-to-exterior space ratio.
- Use the 135-space spiral layout if you want to avoid the frustration of backtracking during daily harvests.
- Adopt Big Chests immediately to declutter your storage areas and save floor space for machines.
- Consider the Iridium Scythe for dense Garden Pot configurations that were previously impossible to harvest.
- Test reachability if you are a console player to ensure you don't lose access to corner machines.
- Themed sheds can provide a refreshing aesthetic break from the industrial look of a "max-profit" farm.
Start by upgrading one shed to a Big Shed and experimenting with the spiral layout to see how much time it saves you during your next wine harvest.