Home
How to Reach Floor 100 and Farm Iridium in the Stardew Valley Skull Cavern
To master the Skull Cavern, prioritize speed and luck . Use a Desert Warp Totem to arrive at 6:00 AM, consume a Spicy Eel and Triple Shot Espresso for stacked speed buffs, and bring at least 100 Mega Bombs. Use Staircases to skip infested or spiral floors immediately. In the 1.6 update, equipping the Fairy Box trinket provides essential passive healing, allowing you to focus entirely on descending to Floor 100+ where Iridium density is highest.
The Skull Cavern represents the most significant combat and mining challenge in Stardew Valley . Unlike the standard Mines in Pelican Town, this desert dungeon does not feature an elevator system, meaning every run starts from Floor 1. Success requires a shift in mindset from thorough exploration to aggressive descent. By utilizing the latest mechanics introduced in the 1.6 update, players can reach deeper levels more consistently than ever before.
What You Need to Pack Before Entering the Desert
Preparation is the deciding factor between a wasted day and a chest full of Iridium Ore. You cannot rely on finding resources inside the cavern; you must enter with a fully optimized inventory. The goal is to minimize the time spent in menus and maximize the time spent breaking rocks.
The "Speed + Luck" Food Stack
In Stardew Valley , certain buffs can stack if they come from different categories (food vs. drink). According to official game mechanics , the most effective combination is Spicy Eel (which grants +1 Luck and +1 Speed) paired with Triple Shot Espresso (which grants an additional +1 Speed). This dual-speed boost allows you to outrun Serpents and reach ladders before monsters can swarm you. Luck is equally vital, as it increases the probability of a ladder or shaft appearing when you break a rock.
The Neutral Healing Strategy
A common mistake is using food with buffs (like Glazed Yams or Autumn's Bounty) to heal mid-run. Doing so will overwrite your active Speed and Luck buffs. Instead, you should carry large quantities of "neutral" healing items. Gold-star Cheese is widely considered one of the top choices because it restores a massive amount of health and energy without affecting your active status effects. Other excellent options include Salads (purchased from Gus) or Iridium-quality Cacti found right outside the cavern entrance.
Essential Mining Tools
Forget the pickaxe for general clearing; it is far too slow. You need Mega Bombs for large open areas and standard Bombs for tighter corridors. However, the "secret weapon" for many high-level players is the Explosive Ammo Slingshot . This tool allows you to fire projectiles that explode on contact with walls or enemies, instantly clearing rocks at a distance. This is significantly faster than waiting for a bomb fuse to detonate.
How the 1.6 Update Changes Your Skull Cavern Strategy
The 1.6 update introduced several features that have shifted the "meta" for deep-floor runs. These additions provide a form of power creep that makes reaching Floor 100 more accessible for intermediate players while offering new heights of efficiency for veterans.
The Fairy Box
This trinket provides a companion that heals you periodically. It is a significant advancement for "Qi’s Hungry Challenge," where eating is forbidden.
Magic Quiver
Automatically fires at nearby enemies. This is exceptionally strong for keeping Serpents at bay while you focus on mining nodes.
Statue of Blessings
Touching this in the morning can grant the "Butterfly Blessing," ensuring a ladder appears under the very first rock you break in the cavern.
Beyond trinkets, the Mining Mastery rewards are notably innovative. The Statue of Heroism allows you to choose a daily combat buff, while the increased yield from gem nodes makes every floor more profitable. If you have reached the Mastery Cave, prioritize these rewards before attempting a serious Iridium farm. The ability to find more Prismatic Shards and Iridium Ore per node significantly reduces the number of floors you need to clear to meet your goals.
Why There Is No Elevator and How to Skip Floors Instead
A frequent point of confusion for new players is the search for an elevator. Unlike the town Mines, the Skull Cavern does not have an elevator . Every time you leave, the floors reset, and you must start from Floor 1 the next day. This is a deliberate design choice to increase the difficulty and reward of deep-floor exploration.
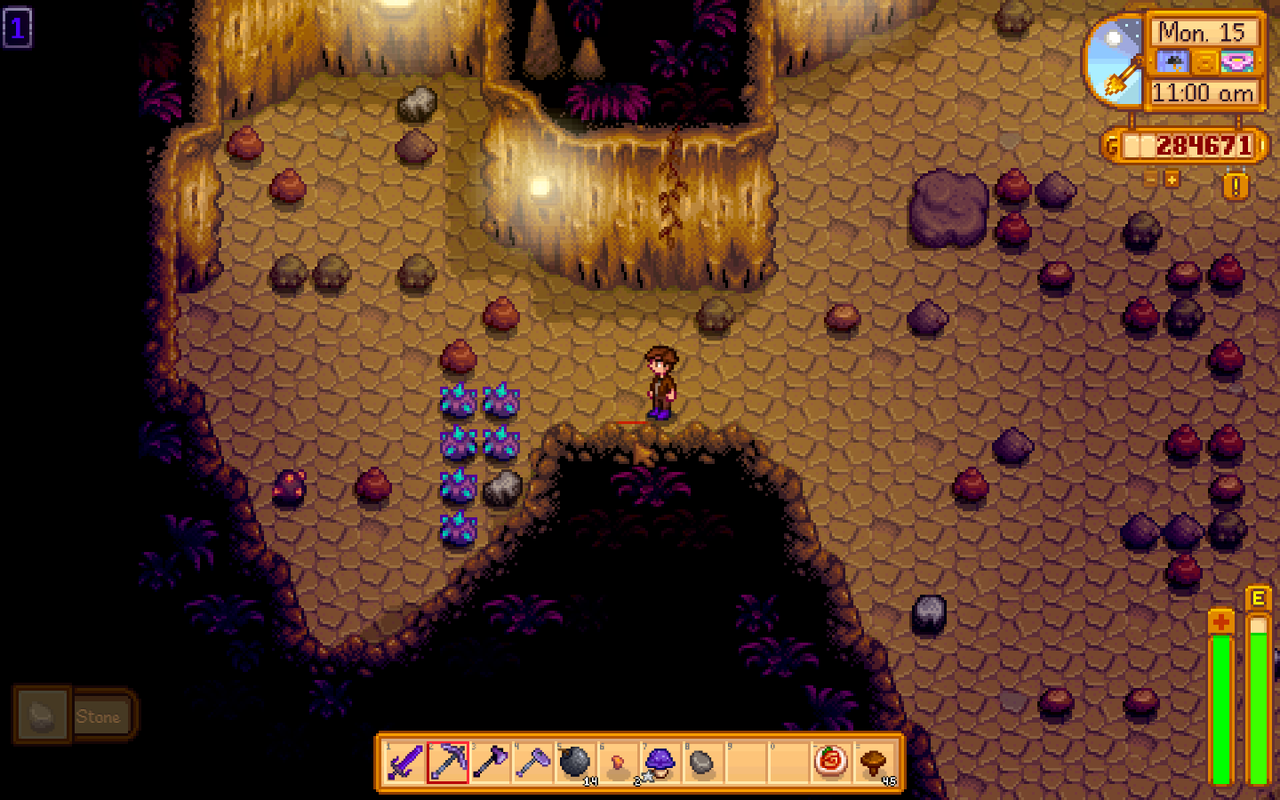
Image source: IGN
The Mechanics of Shafts (Holes)
To reach Floor 100, you cannot rely solely on ladders. You must look for Shafts (holes in the ground). Shafts have a 20% chance to replace a ladder spawn and can drop you anywhere from 3 to 15 floors at once. While falling through a shaft deals damage, it is a vital trade-off for saving time. The damage taken is calculated as 3x the number of floors skipped. Crucially, you cannot die from a shaft fall ; the game will always leave you with at least 1 HP.
When to Use Staircases
Staircases are your most valuable resource for skipping "time-waster" floors. You should use a staircase immediately if you encounter:
- Infested Floors: These require you to kill every monster to spawn a ladder, which is a massive time sink.
- Spiral Layouts: The walk to the center takes too long; skip these to maintain your momentum.
- Prehistoric Floors: Unless you are specifically hunting for Dinosaur Eggs, these floors are generally low in Iridium density.
How to Reach Floor 100 for Mr. Qi’s Cryptic Note Quest
Reaching Floor 100 is a milestone that rewards players with Iridium Snake Milk , which permanently increases your health by 25 points. Achieving this requires a strict adherence to time management and resource allocation.
| Method | Start Time | Time Advantage | Cost |
|---|---|---|---|
| Pam's Bus | 10:10 AM | Baseline | 500g |
| Desert Warp Totem | 6:00 AM | +4.2 Hours | 1 Omni Geode |
| Desert Obelisk | 6:00 AM | +4.2 Hours | 1,000,000g |
As shown in the table, using a Desert Warp Totem is a top-tier strategy for early-to-mid game players. Starting at 6:00 AM gives you four extra in-game hours, which can be the difference between reaching Floor 90 and Floor 120. You can purchase the recipe from the Desert Trader or trade Omni Geodes for individual totems.
The "10 Staircase" Dialogue Myth
There is a common misconception that using more than 10 staircases will "fail" Mr. Qi's quest. This is false. While Mr. Qi will give you different dialogue—calling you "clever" if you used few staircases and "honorable" if you didn't—the reward is identical . If your goal is simply the health boost, do not hesitate to use 80 or 90 staircases to reach the goal quickly. The "Sunday Jade Meta" (trading Jade for Staircases at the Desert Trader) makes this strategy highly sustainable.
Advanced Combat and Mining Tactics for Pro Players
Once you have the basics down, you can implement high-level techniques to further increase your efficiency. These methods focus on "frame-perfect" movement and maximizing the utility of every bomb placed.
- The Explosive Ammo Meta: Instead of placing a bomb and waiting, fire explosive ammo at rocks near the walls. The explosion is instant, allowing you to check for ladders while moving toward the next cluster. This is widely regarded as one of the most efficient ways to clear floors.
- Monster Prioritization: Ignore Slimes and Armored Bugs. Your primary threats are Serpents and Magma Sprites (in hard mode). These enemies move fast and have high reach. Kill them immediately to prevent being knocked into a corner while you are trying to place bombs.
- Ladder Fishing: If you see a large cluster of 10+ rocks, always bomb it. The game calculates ladder spawns based on the number of rocks remaining on the floor; clearing large clusters early gives you the highest probability of a quick exit.
- The Napalm Ring Strategy: By equipping a Napalm Ring, every enemy you kill explodes like a small bomb. This allows you to clear rocks for free while defending yourself, saving both gold and inventory space.
Effective Ring Combinations for Immortality and Speed
With the introduction of the Forge on Ginger Island, you can now combine two rings into one, allowing for four active ring effects. Choosing the right "recipe" can make you nearly invincible or incredibly fast.
The Immortal Miner
Combine a Vampire Ring with a Slime Charmer Ring . Add the Crusader enchantment to your sword. This build allows you to heal by killing monsters and ignore all damage from Slimes, which are the most common enemies.
The Speed Demon
Combine a Savage Ring with a Lucky Ring . The Savage Ring gives you a massive speed boost after killing a monster, which stacks with your coffee and food, making you move at a remarkable pace.
The Loot Goblin
Combine a Burglar's Ring with a Lucky Ring . This is a premier choice for farming Prismatic Shards, as it doubles the loot drops from monsters while increasing the base drop rate via the Luck stat.
According to community discussions on Reddit , the Iridium Band remains a staple for its light and magnetism, but it should almost always be fused with a utility ring like the Slime Charmer to maximize its value. The 1.6 update's trinket slot further complements these builds, allowing for even more specialized roles.
Comparing Budget Loadouts to End-Game Iridium Farming Builds
You don't need the best gear in the game to start making progress in the Skull Cavern. Understanding the difference between a "budget" run and a "pro" run helps you manage your expectations and resources.
| Feature | Budget Build | Pro Farmer Build |
|---|---|---|
| Weapon | Lava Katana | Infinity Blade (Crusader) |
| Healing | Salad / Hops | Gold-star Cheese / Magma Cap |
| Explosives | Regular Bombs | Mega Bombs + Explosive Ammo |
| Movement | Coffee + Spicy Eel | Triple Espresso + Spicy Eel |
| Floor Goal | Floor 40-60 | Floor 150-300+ |
A budget build focuses on survival and gathering enough Iridium to craft your first few Iridium Sprinklers. A pro build, however, is designed for "deep diving." By the time you reach Floor 150, almost every other rock is an Iridium node. The efficiency of a pro build is exceptionally high, often yielding 300-500 Iridium Ore in a single day, whereas a budget run might only yield 30-50.
Frequently Asked Questions
- Does the Skull Cavern ever end?
- No, the Skull Cavern is mathematically infinite. While the floor numbers can technically reach the billions, the game will likely crash or behave strangely long before you reach a physical limit. For practical gameplay, there is no "bottom" floor.
- What happens if I pass out at 2:00 AM inside the cavern?
- If you pass out due to time, you will wake up in your bed the next day. You will lose 10% of your gold (up to a maximum of 1,000g), but you will not lose any items . This is often a preferred trade-off for staying until the very last second to mine Iridium.
- How do I get the Skull Key?
- The Skull Key is found in a chest on Floor 120 of the regular Mines in Pelican Town. Once obtained, it is stored in your Wallet (found in the Skills tab of your menu) and allows you to enter the Skull Cavern and play the Junimo Kart arcade game.
- Is the Quarry Cavern the same as the Skull Cavern?
- No. The Quarry Cavern is a single-floor dungeon located near the Quarry. It contains Haunted Skulls and the Golden Scythe. It is significantly easier than the Skull Cavern and does not reset its layout daily.
- What is the most effective way to get Prismatic Shards?
- The most effective method is to reach floors deeper than 100, where Iridium nodes are abundant. Every Iridium node has a 4% chance to drop a Prismatic Shard. By bombing large clusters of these nodes, you maximize your chances of finding multiple shards per run.
Key Takeaways for Your Next Skull Cavern Run
- ✅ Check Daily Luck: Only attempt deep runs on "Purple Star" days for maximum ladder spawn rates.
- ✅ Warp Early: Use a Desert Warp Totem to start your run at 6:00 AM sharp.
- ✅ Stack Buffs: Always keep Spicy Eel and Triple Shot Espresso active simultaneously.
- ✅ Use Neutral Food: Heal with Gold-star Cheese to avoid overwriting your speed and luck buffs.
- ✅ Prioritize Shafts: Jump into holes whenever they appear to skip up to 15 floors at once.
- ✅ Skip Bad Floors: Use Staircases immediately on Infested, Spiral, or Prehistoric floors.
- ✅ Equip Trinkets: In 1.6, use the Fairy Box for passive healing or the Magic Quiver for defense.
Start your next run by trading your accumulated Omni Geodes for Desert Warp Totems at the Desert Trader to ensure you have the maximum time possible for your descent.